Showing posts with label Cooking. Show all posts

Saturday, July 23, 2011

City Mice

Before reading this post, sit down because you might be here for a while. You might even want to grab a cup of coffee to keep awake. This is going to be a long post covering events of yesterday evening and today.


Yesterday Sammy was sick, again, so we had to cancel a long awaited sleepover she was having with a friend. We intended to let the girls camp in the backyard for an extra special slumber party, but it was not to be. After much consideration, and a little bit of a spring in Sammy's step, by late afternoon we'd decided the slumber party was back on, this time with just our family. We cracked open the brand new six person, octagonal tent, Jon had bought a few days ago and started assembling it with a great deal of enthusiasm... at first. After an hour or so, it became all too clear that the tent was a lot smarter than us. We gave up. As much as I hate to admit it, it was just too damn hard and we were tired of wrestling with it. After all, we are, City Mice, and know not the ways of erecting tents and such, instead we are much better at erecting a suitcase in which to place our travel clothes for hotel stays.


Despite our pathetic attempts at outdoorsy fun, we settled on a simple backyard fire complete with Nutella S'mores.


The girls camped out in the family room instead of under the stars.


By morning, we were all hungry for a big breakfast {fighting with a tent will make you ravenous) so I made these Pikelets from Donna Hay. I'll have to provide the recipe later as I am too tired to type out the recipe now.


After breakfast it was off to explore our sunny city. As you probably know by now, it just isn't a family outing without a trip to a long board store. And yes, Jon did manage to buy another one -- with our encouragement of course.


Then it was off to downtown Seattle where we explored the open market and cavernous stores and eateries.


After the girls had ice-cream at Pike Place Market, we stopped in at the Chocolate Box - a cruel thing to do after the girls had already eaten their ice cream. Their hungry eyes wanted more treats but we just couldn't bring ourselves to give them more, so we left with having only a few samples.


Then it was off to Tune, a high-end audio store where we checked out a few turntables. And yes, I did explain to the children what the big black discs were and why they were going around and around on the flat plate.


We walked to the Olympic Sculpture Park where we rested and also played.


We listened to the gurgle of Seattle's underbelly through the large orifice in the center of this installment. Okay, maybe it wasn't Seattle's underbelly, but if you had to imagine it, it would probably sound like the glurp whoosh bubble bubble coming out of this contraption.


The City Mice showing off their sharp teeth and claws.


After taking the photos we saw the sign that read, "Do Not Touch." Oops.


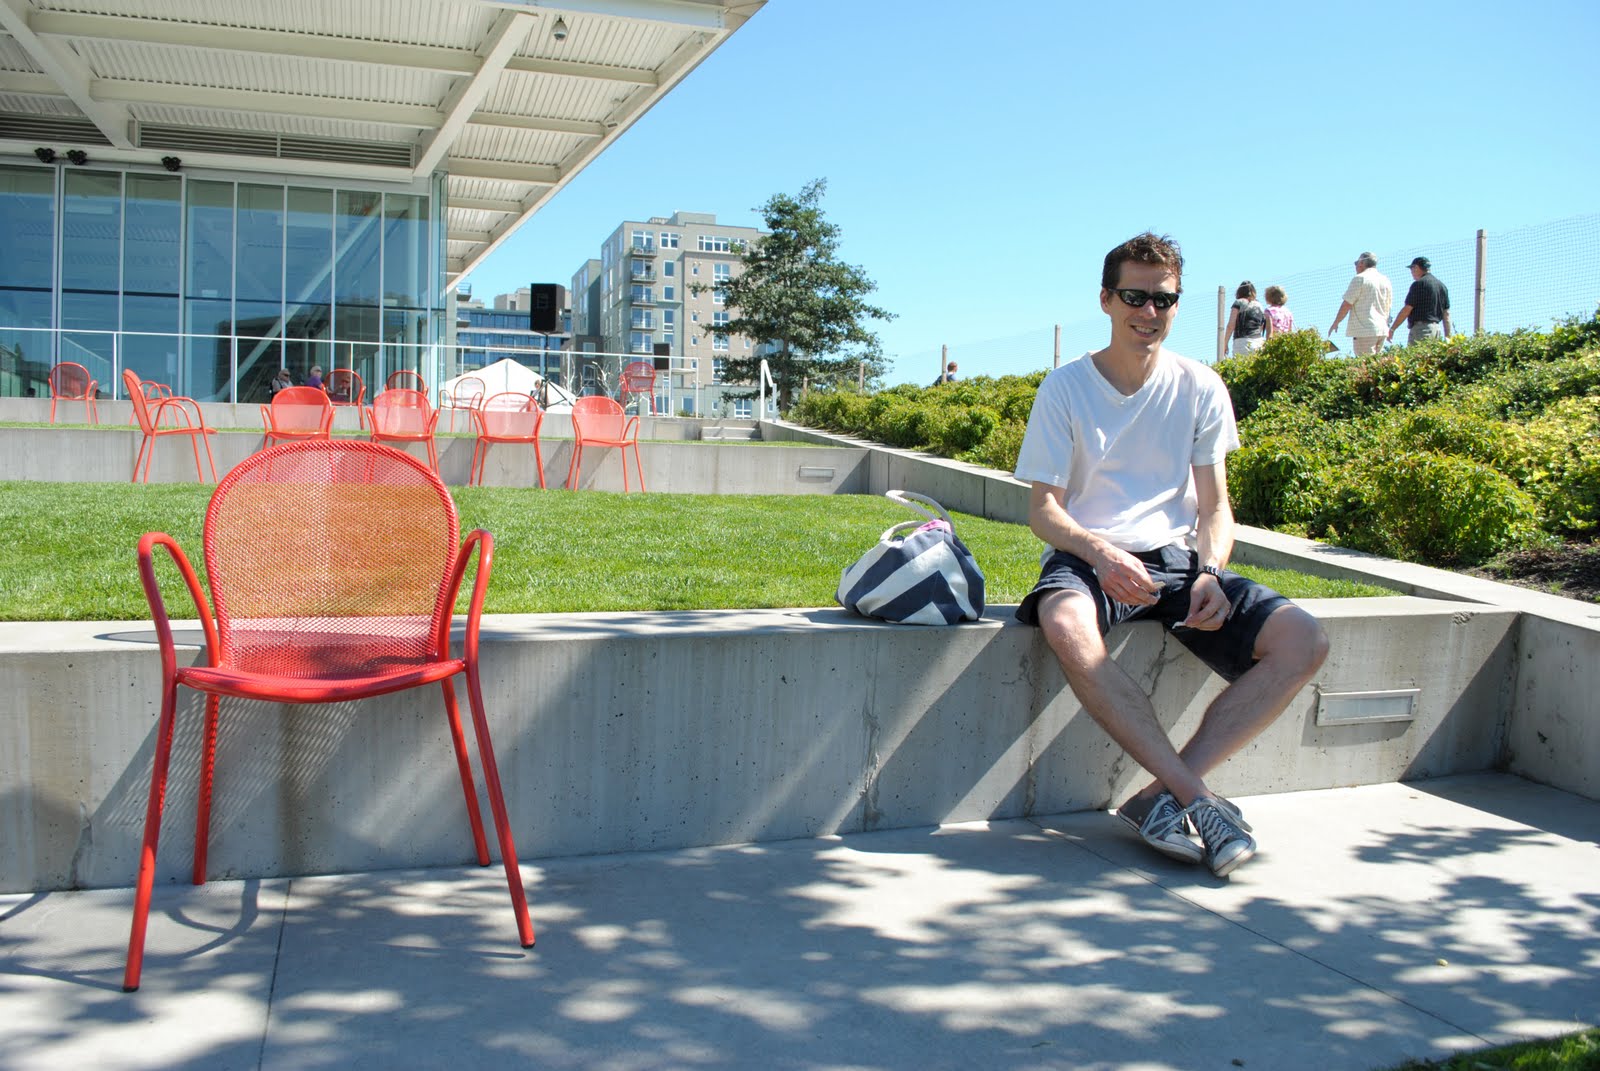
I call the above image: Man, Red Chair and Striped Handbag. HA!!


It was such a beautiful day and this bride picked the perfect day to start her new life. I apologized to her for taking her picture but told her that I thought she looked gorgeous. I don't think she minded what with that radiant smile of hers.

This orange bike is fabulous.


Finally we arrived home after a long day walking the hard pavement of downtown Seattle. Jon made possibly the best ever iced coffee drink I've ever wrapped my lips around. But because it contains: condensed and evaporated milk along with concentrated coffee, I don't know how many more I'll be having -- it was extremely decadent. My husband knows me too well. I suppose I was supposed to sip it... I didn't. I chugged it. Yummy.


We City Mice were wiped out by the end of the evening -- well, except for me. After having that coffee I'll be up all night, hence the long post.

Friday, March 18, 2011

Turkey Meatballs: Kid Tested, Mother Approved


I think I told you that I struggle with meal planning. Between work and shuttling my children to and from school and around to their various activities, dinner is hardly something I think about until the very last minute. Most days I find myself scrambling at the last minute for something good to eat. So earlier this week, I did a little planning. I'd made up my mind that sometime during the week I would make Turkey Meatballs. Alex was super excited to help and after thinking about it for a few moments, I told her that I wanted her to do more than help, I put her in charge of the meatballs while I got together the spaghetti and pasta sauce... and by getting together the sauce I meant opening the jar of Prego and then pouring it into a pot.


Alex very happily poured in all the ingredients (after I pre-measured everything) and then using her hands, mixed everything together.


Alex used a cookie scoop to make sure the meatballs were consistent in size.
 
The entire family gobbled them up.

If you try this recipe and like it {I have no doubt that you'll love them} double the recipe and put half in the freezer as your secret stash for another meal -- did someone say Meatball Subs?


Ingredients

2 tablespoons olive oil
1 (20 ounce) package ground turkey (do not use the extra lean or the meatballs will come out dry)
1 egg, beaten
1/3 cup Italian seasoned bread crumbs
1/2 teaspoone ground sage
1/8 teaspoon garlic powder
1/8 teaspoon onion powder
2 tablespoons grated parmesan cheese
Salt
Pepper
Preheat the oven to 350 degrees F (175 degrees C). Grease a 9x13 inch baking dish with the olive oil, and place it in the oven while preheating.               

In a medium bowl, mix together the ground turkey, egg, and bread crumbs using your hands. Using an ice cream scoop if possible, form the meat into golf ball sized meatballs. Place about 1 inch apart in the hot baking dish. Press down to flatten the bottom just slightly.               

Bake for 15 minutes in the preheated oven, then turn them over, and continue baking for about 5 more minutes, or until somewhat crispy on the outside. Serve with pasta and sauce or however you'd like.               

Friday, March 4, 2011

Mexican Mac & Cheese

Meal planning, for me anyways, is the most challenging mothering chore. I’m not unhappy about making meals, it’s just hard to find the right balance between making something quick, healthy, satisfying and most importantly, delicious. I read food blogs all the time and therefore I have no trouble finding foods that make my mouth water but what I can’t figure out is how anyone has the time to create such elaborate meals. Tell me, how does one do it!? There’s also the fact that I’m trying to feed a family of four – each person wanting something unique to their own personal palate. If I could pop a Boboli pizza in the over every single night of the week, my problem would be solved. But even then, Alex likes turkey pepperoni, and Sammy doesn’t. I can’t win.

The other day I was in a meal planning rut, and overall frustrated with my meager mealtime arsenal. I make the same dishes each week and am starting to sense that my kids are getting bored with the foods I put in front of them. I was reading Better Homes and Gardens and found a recipe for Mexican Mac & Cheese. Perfect! We all love Mexican food AND pasta and hadn’t thought about putting the two together. I just love food mash-ups!! See more food mash-ups {here} and {here}.

There wasn’t much to the Mexican Mac & Cheese, but I knew it wouldn’t go over well with everyone in my family, so I made some changes to make it more kid friendly and came up with the following:

Ingredients
3 Large Boneless Chicken Thighs cut into small bite-size pieces (you can use breast, but I mistakenly bought thighs)
1 pound pasta shells
1 jar of mild picante sauce
1 package taco seasoning
2 cups of shredded Monterey Jack Cheese
1 cup shredded Mozzarella Cheese
Sliced olives
Shredded Carrots

Preheat oven to 350 degrees.

Lightly grease 3-quart rectangular baking dish; set aside. Cook pasta according to package directions, drain and set aside. In a separate bowl, combine the two cheeses and set aside. In a large skillet, brown the chicken (drain the fat) and season with your preferred amount of taco seasoning. I used less than half a package.

In prepared baking dish layer half of the cooked pasta, half the seasoned chicken, half the cheese, and half picante sauce. Repeat layers. Bake, covered, for 35 minutes or until bubbly. Let stand for 10 minutes. Top with olives and carrots. To add spice, you can add jalapenos.

Oh, and the chicken thighs in this dish were great, I'm glad that I made this mistake.

And for something completely random, Alex tested a theory she heard from a classmate. Her theory: if you wear your jammies turned  inside-out to bed, and place a spoon under your pillow, it will snow in the morning. I'm sad to report that it didn't snow this morning. Can't blame a girl for trying.

Tuesday, January 11, 2011

Mixed Up Salad and Vinaigrette

Tonight I made a salad which is a huge deal. You see, normally in our house, a salad consists of lettuce and store bought dressing -- that's it. And on nights when I'm feeling particularly high-brow, I'll sprinkle in a little Parmesan cheese. It's not that I don't like salad, I just despise chopping and washing vegetables night after night. So instead, salads are kept simple.

Christmas Eve my sister-in law asked me to bring over a salad to have with dinner. I must tell you that this request was disquieting. Normally for family gatherings I'm asked to bring either an appetizer or a dessert, never a salad. I'm still not sure why sister-in-law put me on salad duty, but I'm glad she did. It forced me to do a little research and in doing so, I managed to find a salad that didn't involve a ton of ingredients. To my surprise, the salad was really good {nice} and it was no sweat off my back {real nice}.

I adapted the recipe from a Costco cookbook -- Creative Cooking the Costco Way. Instead of fresh spinach, I used green leaf lettuce; instead of pecans, I used walnuts; instead of Granny Smiths, I used Braeburns. For the salad dressing I took ingredients from several recipes in order to make one that I thought the entire family would enjoy. I guess you can say that this is a Mixed Up Salad. Here are the ingredients:

2 tbsps butter
2 tbsps sugar
1/2 walnuts
Fresh greens of your choice
1 cup dried cranberries
1 large apple of your choice, cut into cubes
1/2 cup {or more if you like} Gorgonzola cheese crumbled

Vinaigrette
1/4 cup sugar
1/4 tsp paprika
1/4 cup white wine vinegar
1/4 cup cider vinegar
1 tbsp minced shallot
1/2 cup vegetable oil

1. Prepare vinaigrette: Combine sugar, paprika, white wine vinegar, cider vinegar and vegetable oil in a jar with a secure lid. {I used a jelly jar}. Refrigerate until ready to use.

2. Melt butter and sugar in a small saucepan over medium heat. Toss in walnuts and cook until coated and slightly darkened. {Watch closely as these cook fast.}

3. Place greens in a salad bowl and toss with 1/2 cup vinaigrette until lightly coated. Add cranberries, apple cubes, candied walnuts, Gorgonzola cheese.

There is plenty of vinaigrette leftover for the rest of the week too. Step aside Paul Newman, there's a new vinaigrette in town. And even though the recipe comes from Costco, all of the ingredients were from Safeway and that's only because I didn't need a tub of Gorgonzola cheese or cranberries.

Thursday, December 30, 2010

Butternut Squash Risotto

I really wish I could keep my tree all year round. I just love the twinkling, white lights and the ornaments. The tree makes the house feel cozy during these frigid, dark days and it's so easy on the eyes too. I've gotten used to seeing it each morning when I round the corner to go to the kitchen. Soon though, it will have to go. In a day or so, we'll strip the tree of all ornaments and lights, and then Jon will man handle it out to the curb where it will be hauled away by Boy Scouts. It sounds so sad. Would I really want the tree up all year? Probably not, because then what would I have to look forward to next year. Yes, eventually the tree will have to go. Take my advice, just like a pig on a farm, don't give it a name, because if you do, you'll grow too attached and then be heartbroken when you find out that Wilbur is resting beside your plate of scrambled eggs at breakfast. No, I didn't name my tree. It's just plain tree to me. No strings attached. It has served its purpose. Now it is time for it to retire to that great big, tree slaughter house in the sky. Ugh!! I think I'm going to be sick...

...let's talk about something that doesn't involve slaughtering, shall we?
Tonight I made Butternut Squash Risotto. Have you ever shopped for arborio rice before? Well if you haven't, know that it is crazy expensive. When I saw the price, I clutched my heart, staggered a bit and said, "Elizabeth, I'm coming to join you... me and a box of aborio rice!"

What you'll need:
Ingredients: 2 cups 1/2 inch diced Butternut Squash; 2 tablespoons olive oil; 1 tablespoon thyme leaves; 4 cups chicken stock; 5 tablespoons unsalted butter; 1 cup diced yellow onion; 2 cups Arborio rice; 1/4 cup dry white wine (or whatever you feel like drinking the rest of from a new bottle); 1/2 cup grated Parmigiano-Reggiano.

Before you begin, bring 4 cups chicken stock and 4 cups of water to a boil and then let simmer. 
Coat butternut squash in olive oil and season with salt, pepper and thyme. Roast at 425 degrees for 20 to 25 minutes.

Saute diced onion in butter until translucent, about 8 minutes.

Add in half of the roasted butternut squash and rice.

Stir the mixture and then add the white wine. Once the wine is fully absorbed into the rice, start adding the broth/water mixture 1 cup at a time. Stir continuously. Once the liquid is fully absorbed, add 1 more cup of the broth/water mixture. Continue to stir and only add in the liquid when the water is completely absorbed. Keep this process going until the rice is cooked to just barely an al dente texture. It shouldn't be runny and it shouldn't be too dry.

I wasn't hungry when I started this process but after over 20 minutes of stirring, I was. Making risotto is hard work, but well worth the effort. 

When the risotto is done, add the remainder of the butternut squash and half of the Parmesan cheese. Mix together, serve hot. Garnish with more cheese.

This is comfort food at its best. The kids didn't much care for it, but the adults loved it! 

For more details about this recipe, please click {here}. 

I thought my last post would be it for this year, but now THIS is my last post of 2010!! So, once again, Happy New Year!!